Corina Kaiser
DM-GY 9103 - Special Topics in Digital Media: Wearables
Professor Kathleen McDermott
NYU Tandon, Spring 2026
—
—
For my Creative Controller midterm project, I have designed a wearable game- titled Pixel Chase- that is hosted fully on the Circuit Playground by Adafruit. This game is coded using Arduino and is controlled by the device’s onboard sensors. Users play this game by tilting the board, which alters the device’s accelerometer readings and “moves” their blue LED along the board’s edge to capture a target green LED while avoiding the red LED.
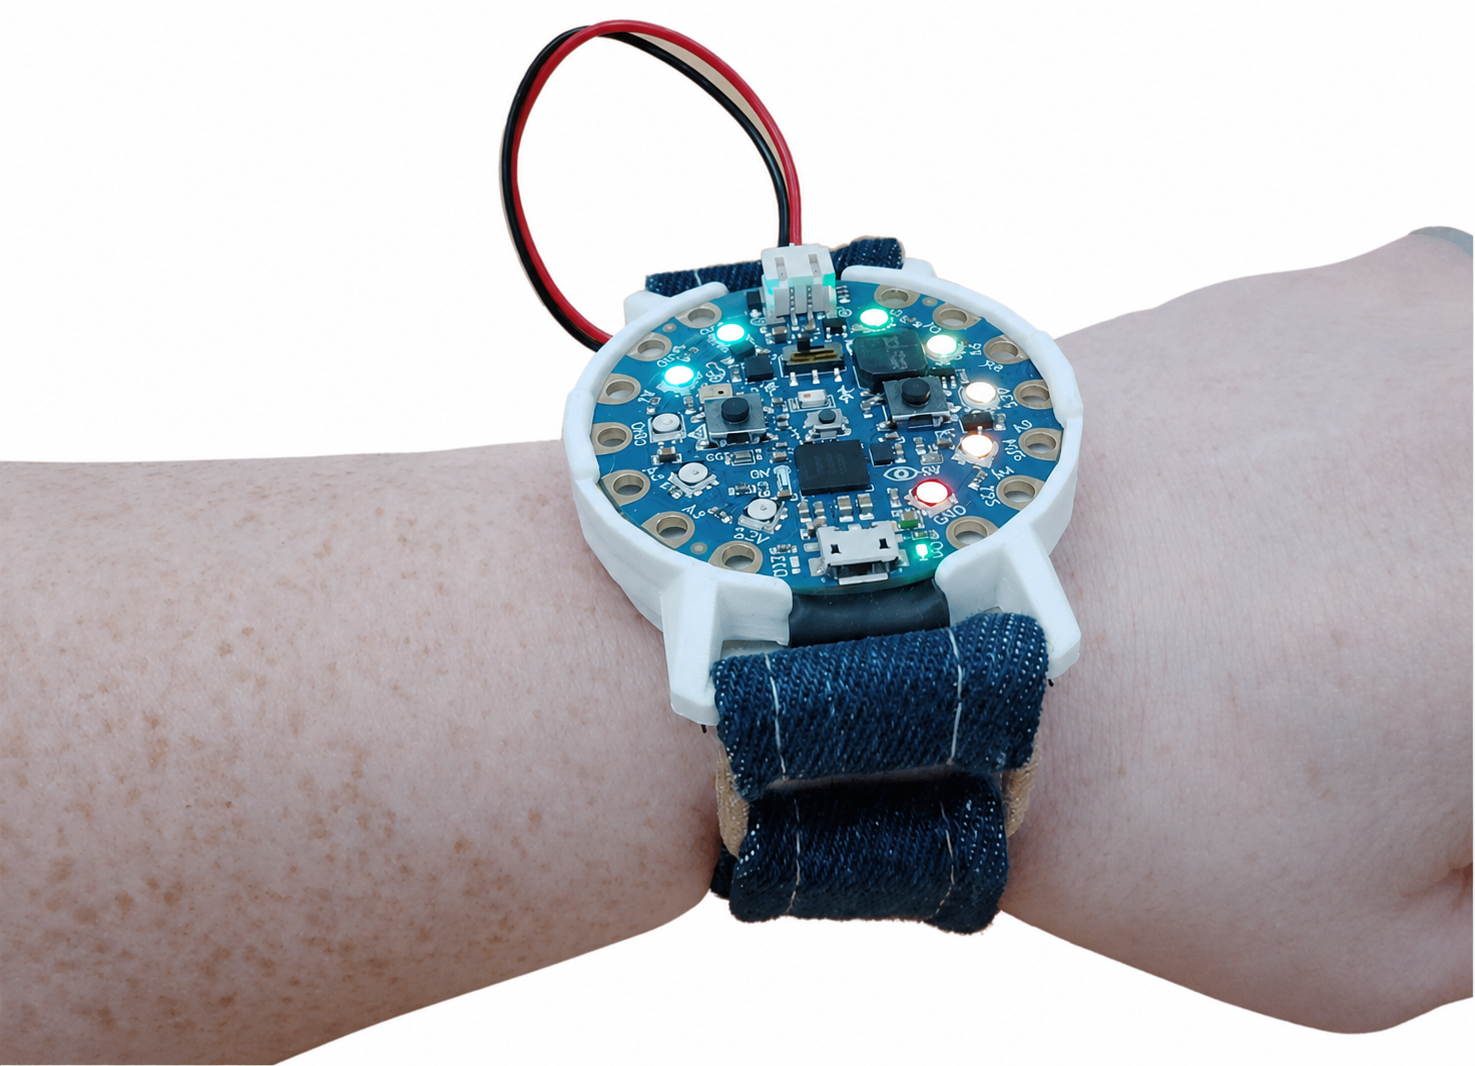
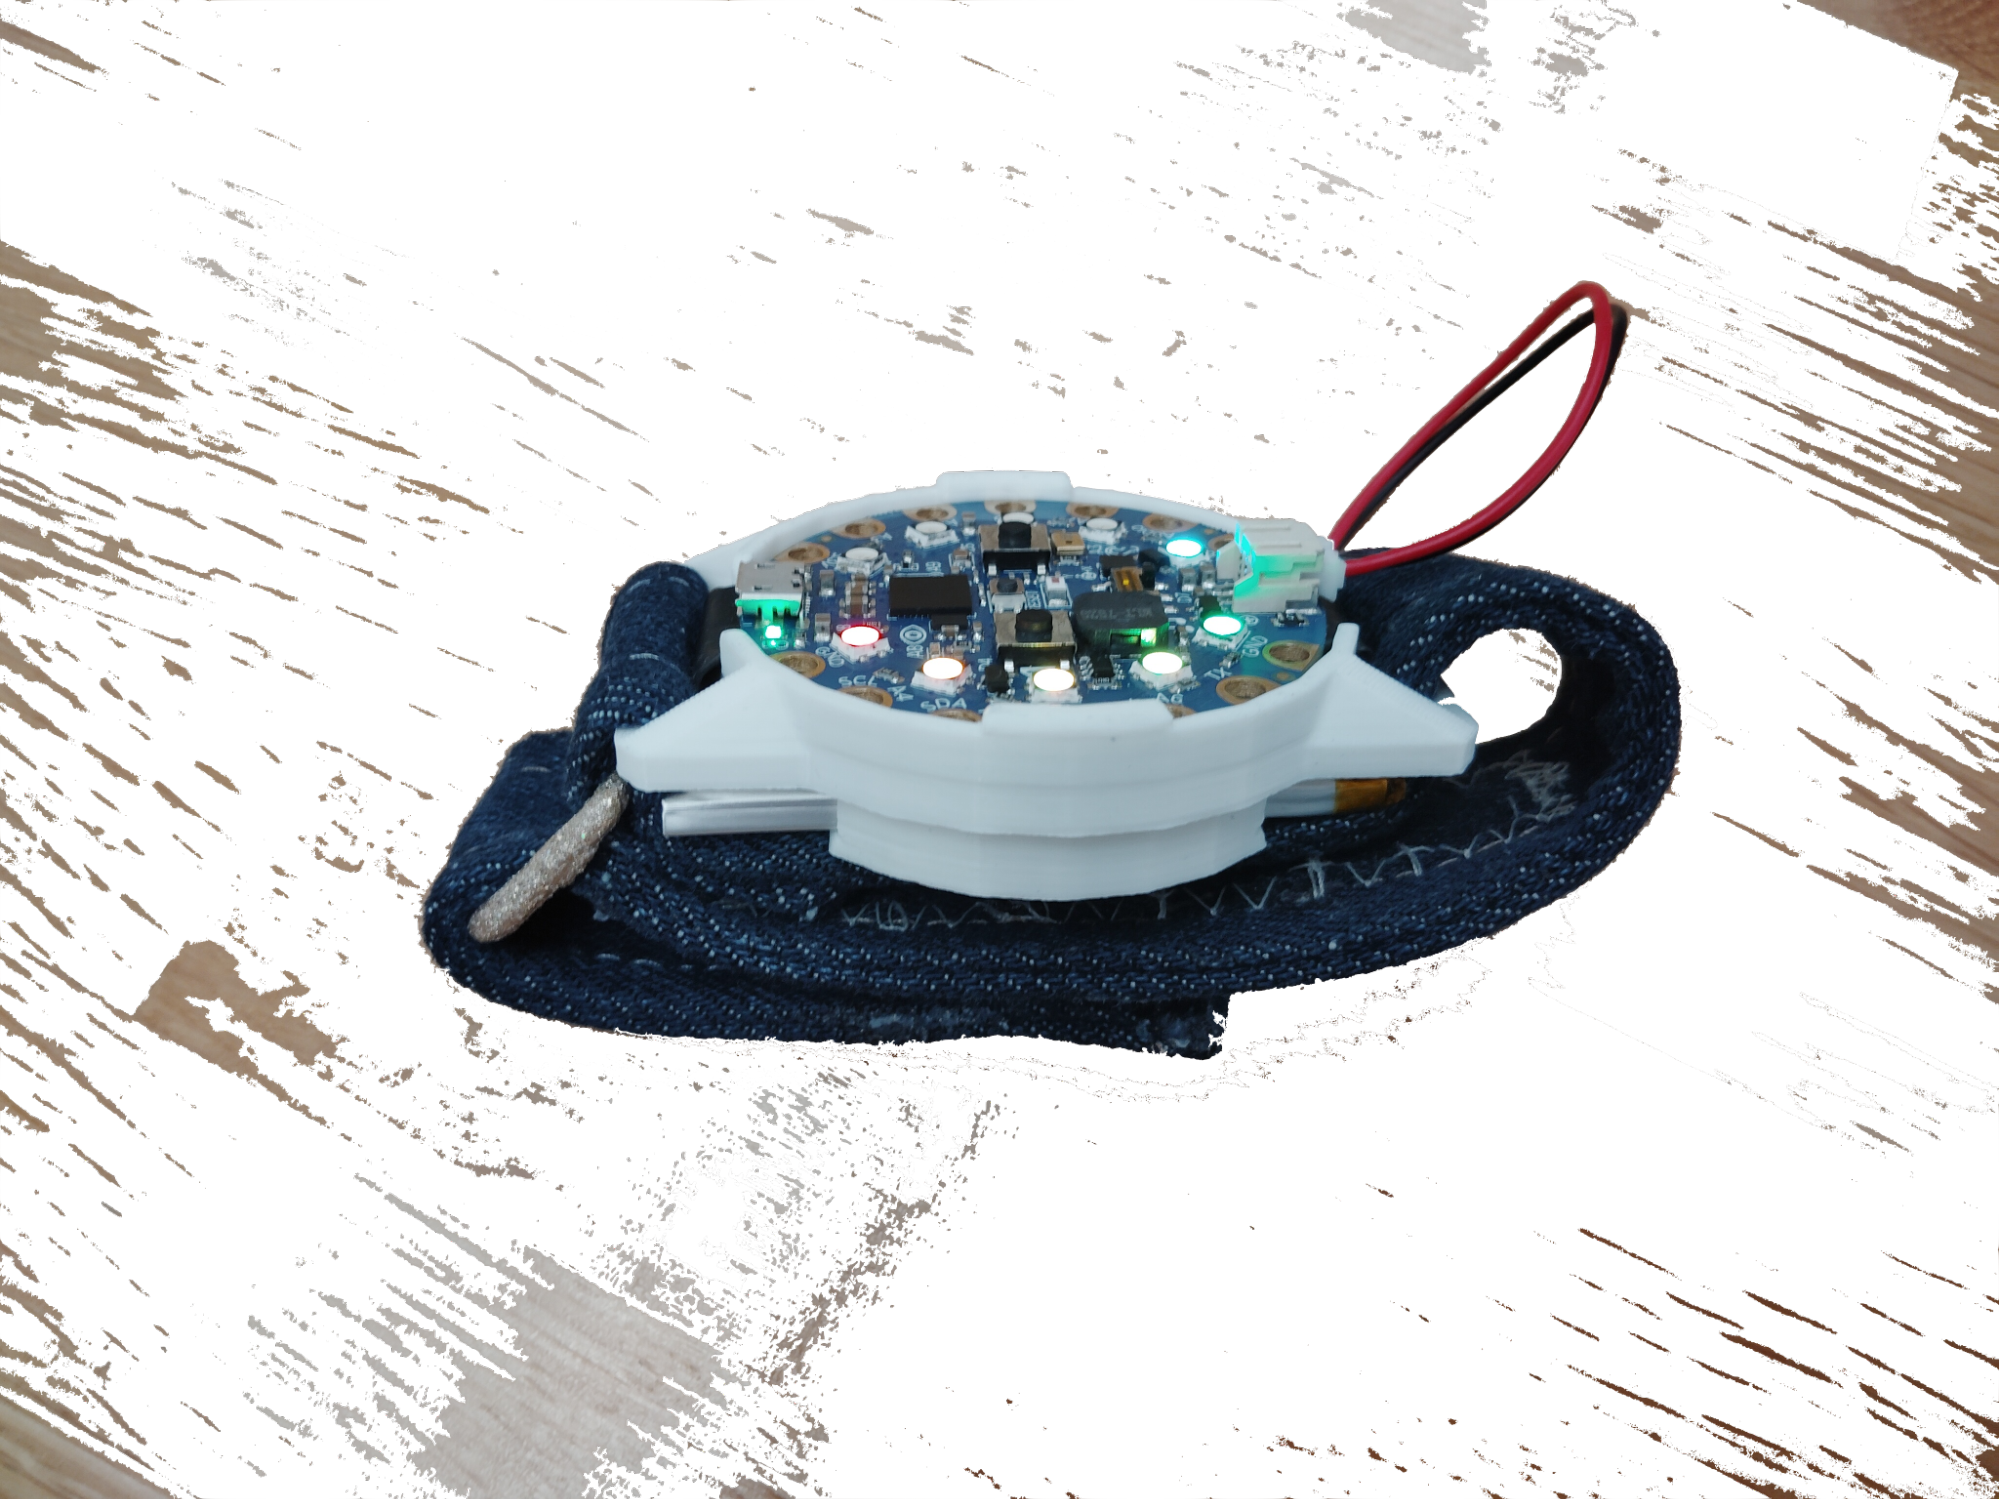
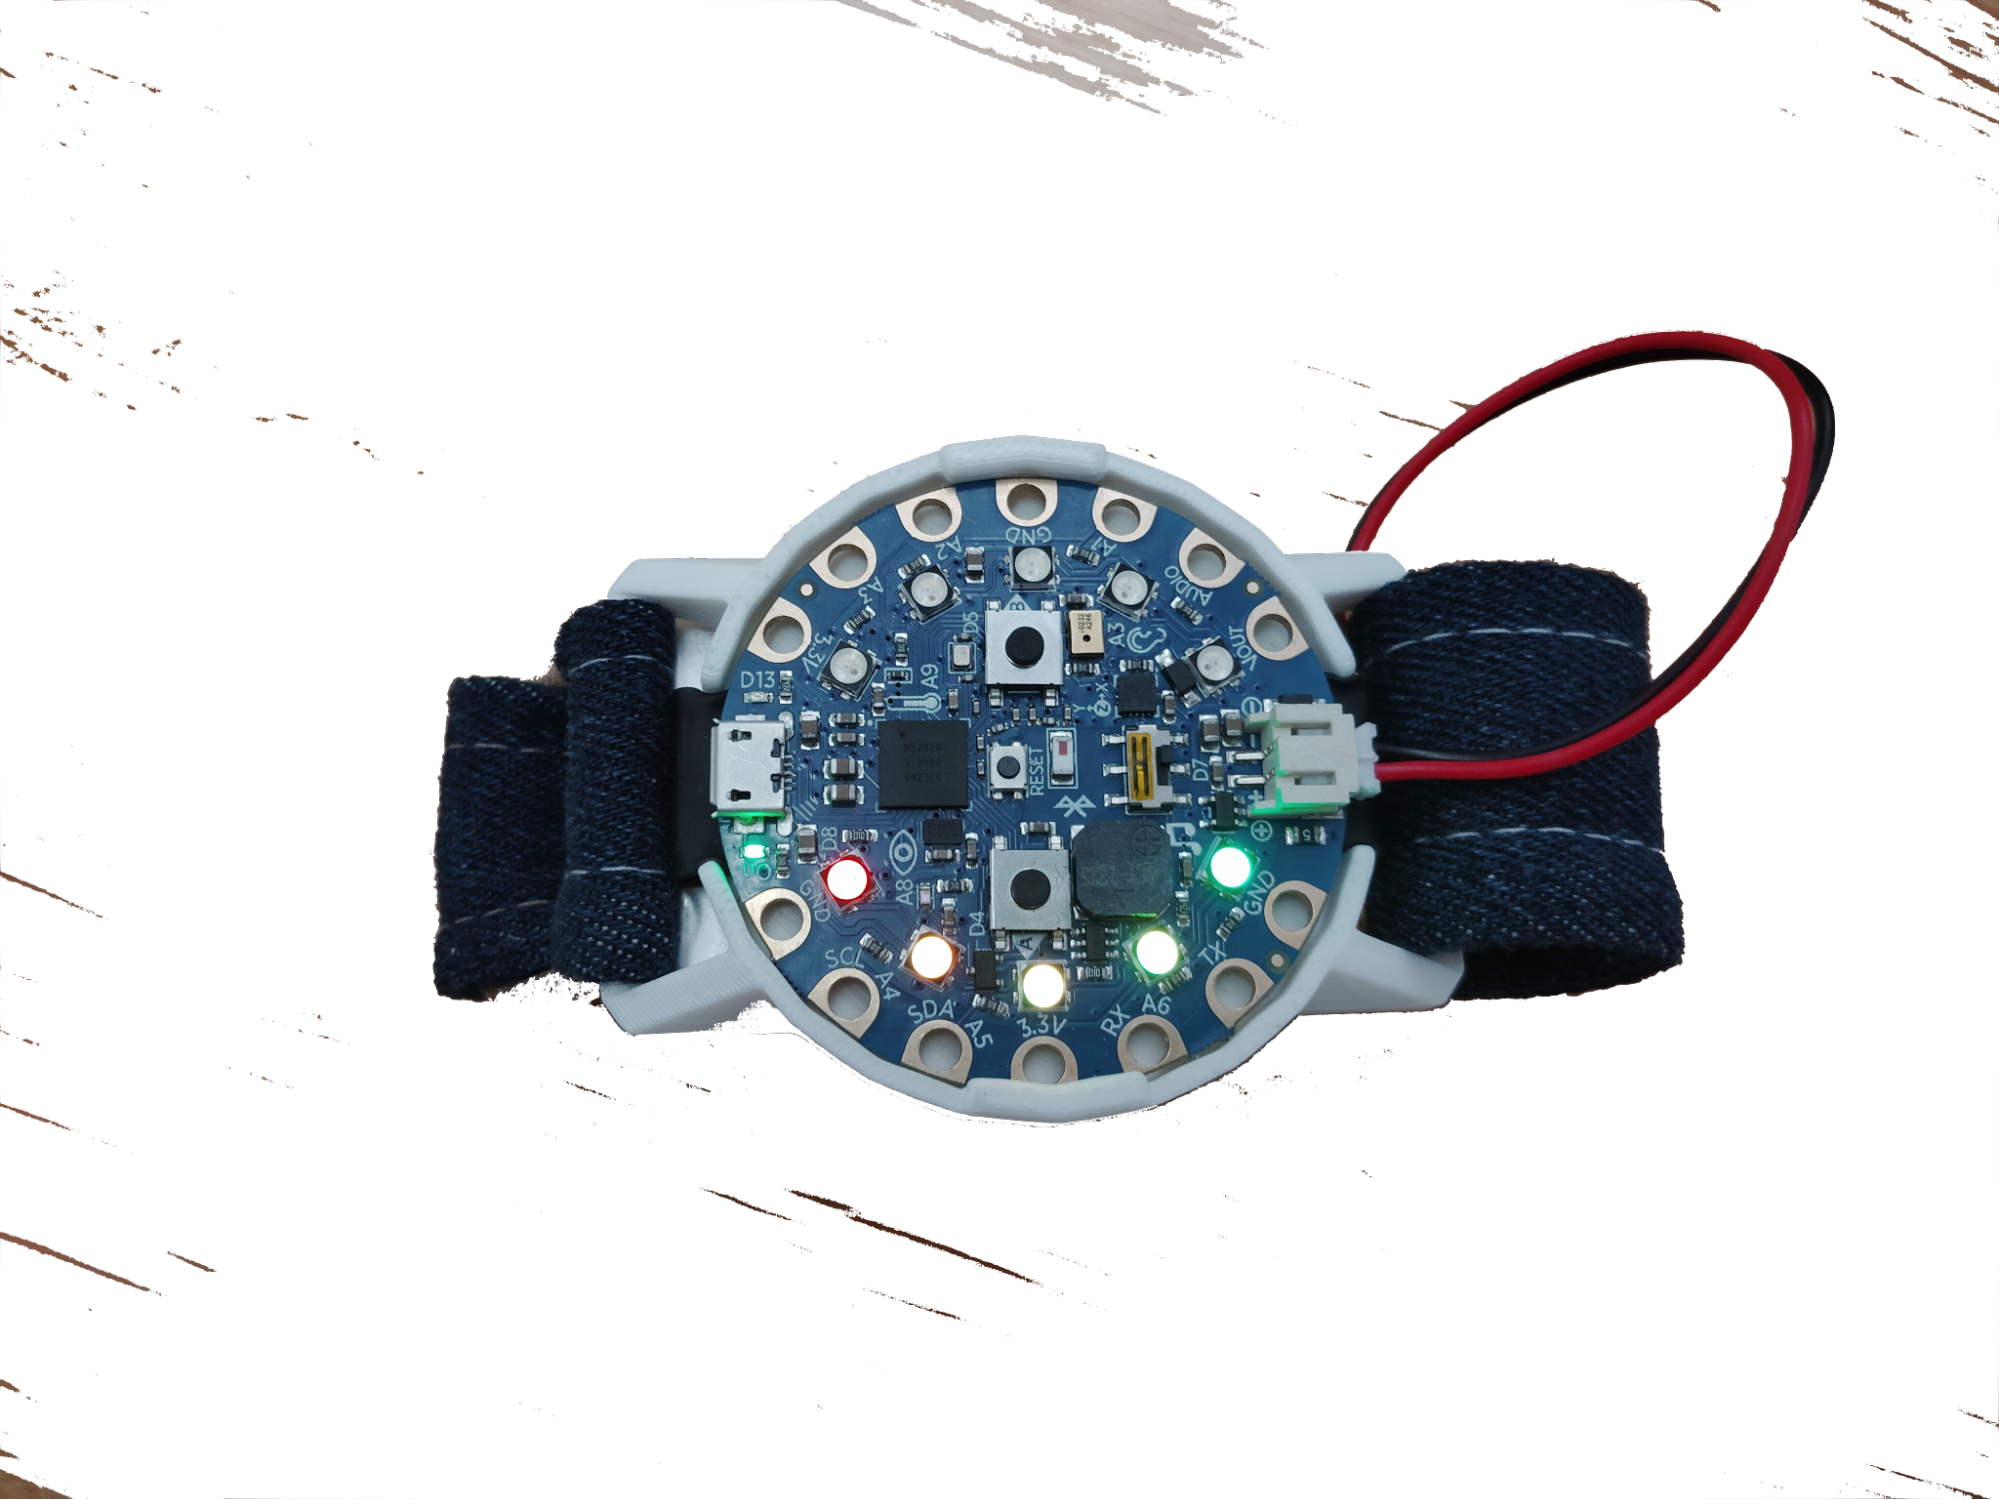
This game is implemented via a wristwatch-style design. The Circuit Playground and Lipo battery are housed in a 3-D printed enclosure which is held onto the player’s wrist via a denim strap with a hook and loop closure.
This piece also functions as wearable LED jewellery, as the default “loading screen” on the board is set to a sound-reactive rainbow LED display when the board is powered but gameplay is not triggered.
In this report you will find a detailed look at my design and build process, including challenges faced along the way and photos to document progress, as well as further considerations for updates to this design.
—
While experimenting with using the sound meter to control the LEDs on the Circuit Playground Express (CPE), a peer suggested that I utilize the accelerometer to gesture the starting point of the reactive NeoPixel (NP) LEDs. That idea of controlling the LEDs with the accelerometer triggered the idea for this game.
The next day, I went to p5.js to draft the code for the game. Here you can view my original p5.js sketch, which utilizes the left and right arrow keys to control the green dot by moving it clockwise (L) and counterclockwise (R) after clicking on the sketch.
In order to implement this on the CPE, I first began by exploring the accelerometer’s readings while holding the board in different positions. I determined that the Z-direction was not relevant to my objective and then realized that I could visualize the front of the CPE as a unit circle on the cartesian plane with the accelerometer’s X and Y readings forming the vector that points to its edge.
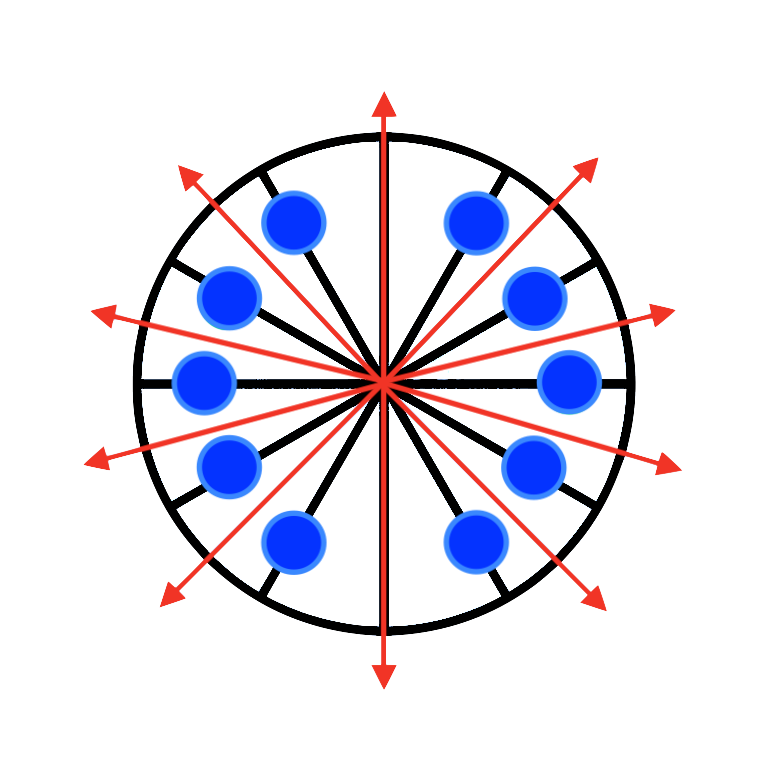
The circuit playground includes 10 NP LEDs: five on each side, equidistant from one another. They are placed in 30 degree increments from one another, so I utilized the inverse tangent function to calculate the angle at which the accelerometer deemed the board to be pointing, then set thresholds to surround each of the lights.
To the right is a visual of the angle tolerances which were set for each of the 10 lights. In this image, each blue circle represents one NP, and each red arrow represents a threshold angle. After some experimentation to determine the NP pin numbers that corresponded to each sector, the code worked wonderfully to “move” a single blue NP around the board by tilting.
I then began building up my program in a similar way to which I had done in p5.js:
At this point, I had emulated my p5.js sketch on the CPE, with the tilt of the board controlling the movement of the player’s NP.
I then set out to improve my game from this basic form.
First, I dealt with the game’s primary issue, which was the logic behind the random respawns: Red Enemy would sometimes spawn on top of Green Target or Blue Player, which would lead to Game Over. I solved this by spawning Green Target at least 2 spaces away, then moving Red Enemy at least one space in a random direction if it were in the same position as Green Target. It should be noted that the modulus operator was doing some heavy lifting here in order to create the seamless movement of the LEDs around the circle.
I then discovered a sound library online which allowed me to import different notes into my program. I utilized these notes, in increasing pitch and duration, to signify each time Blue Player hits Green Target. Plus, I added a short “Game Over” song for when the game is lost. I also added a “level up” experience when the player hits Green Target enough times- this triggers Red Enemy to “chase” around the screen at increasingly faster speeds, which adds to the excitement and difficulty of the game. I later made further improvements such as: allowing the user to choose between Survival Mode or a new Timed Mode based on which push button they press before beginning, assigning the board’s slide switch to control sound on/off, and providing light and sound-based score feedback after Game Over.
Finally, I added a “load screen” to display when the device is turned on- before selecting gameplay mode- and after the score is communicated post-Game Over. This both helps to add as a visual cue that the device is powered on and that gameplay is not ongoing, plus to allow the board to passively contribute to a piece of wearable jewellery- more on that below.
My plan for this game as a wearable primarily centered around it being worn in a similar style to a wristwatch. With the CPE having a similar size to (larger) smartwatch faces, the mobility of the wrist joint, and the comfortable, familiar usage of wristwatches, I felt this would be the ideal implementation. I had also considered that it may be nice as an oversized ring, but decided that it may feel particularly clunky for users, thus making it less comfortable for prolonged wear.
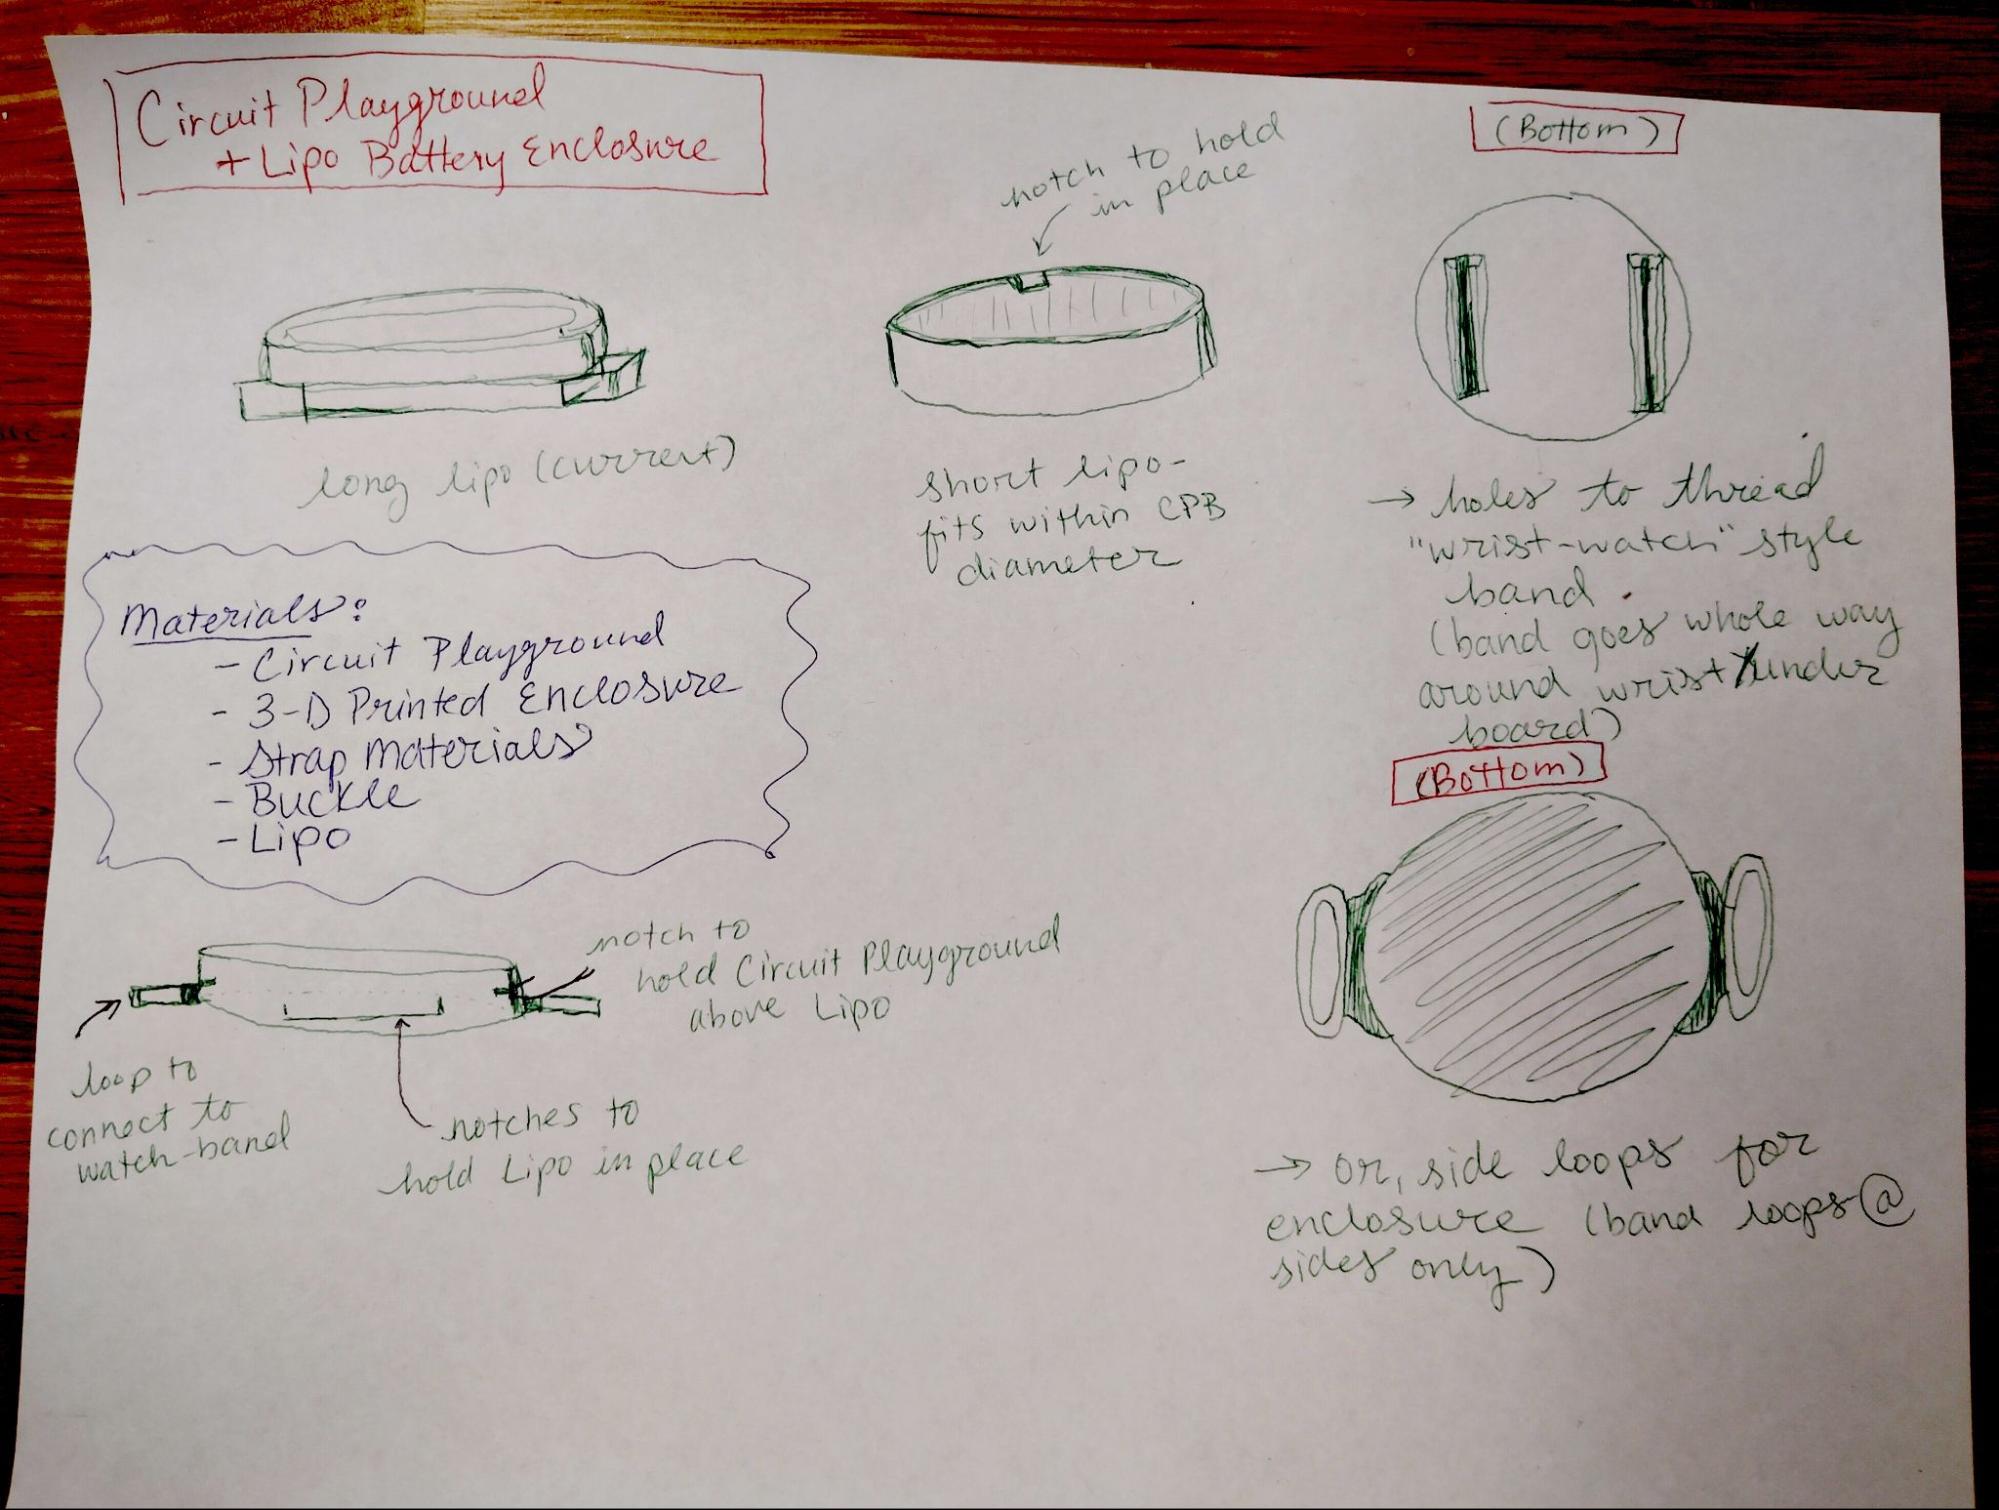
I began by sketching possible enclosures for the CPE and Lipo battery. I then realized that my Lipo was longer than the diameter of my CPE, which caused some difficulties in the design process. I ordered a smaller Lipo online, but continued designing for the longer battery in the meantime. This turned out to be beneficial, as my shorter battery began smoking as soon as I plugged it into the charging adapter, before I even plugged it into power!
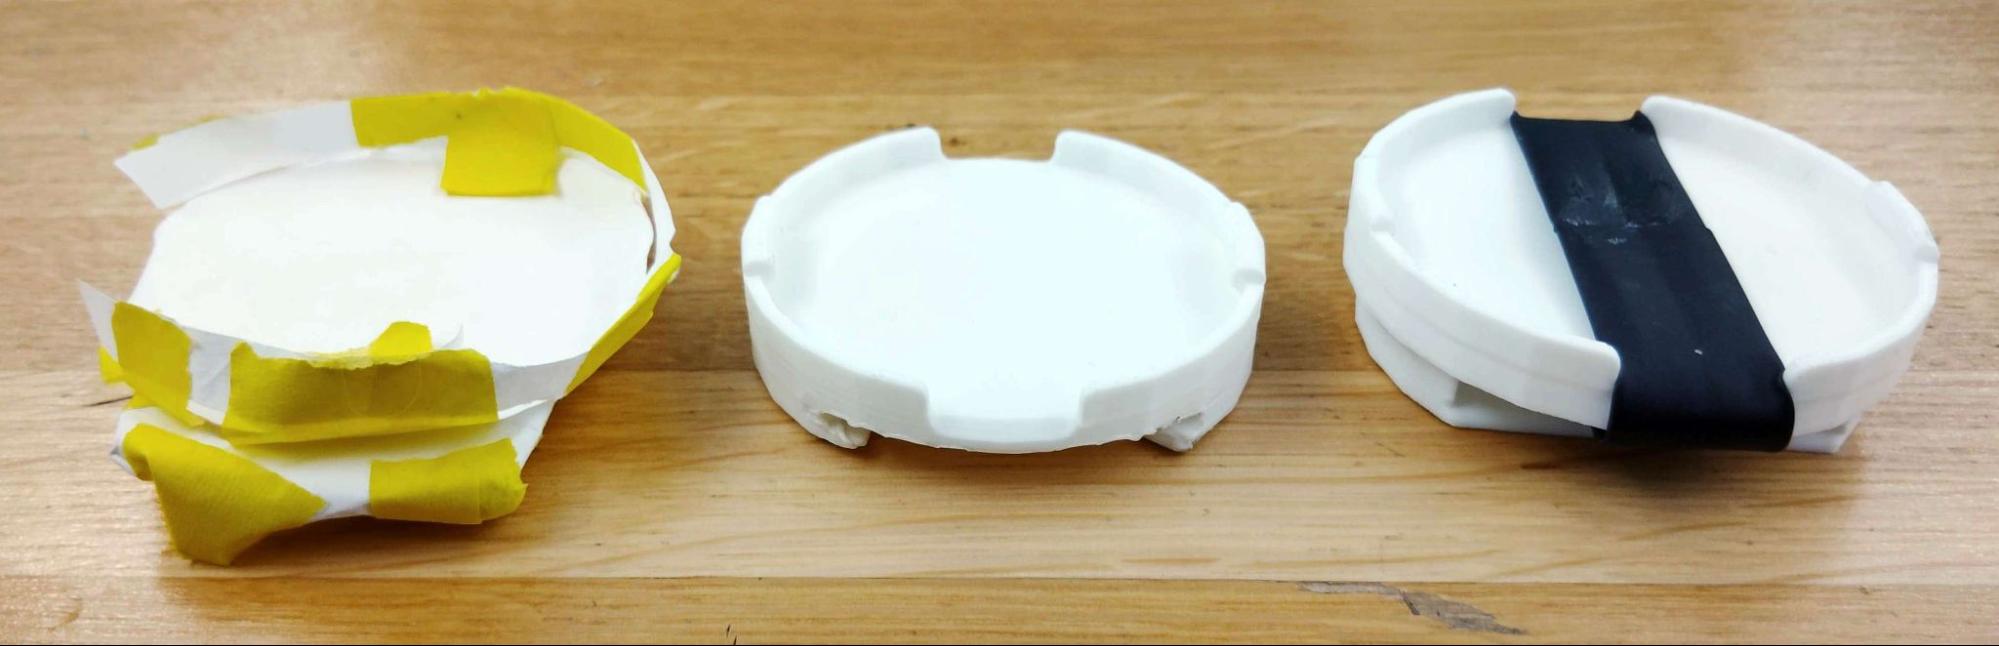
Due to my new distrust of purchasing Lipos on Amazon and the length of shipping times to buy directly from Adafruit, I was forced to continue designing for the longer battery. I created some paper models based on my sketches, and then attempted to create a model on Blender to use in 3-D printing. Though I have used AutoCAD in the past, I was having major difficulties with my attempts to model on Blender, as I have never before used this software. I then attempted to alter a Thingiverse model, but it was not going particularly well.
At this time, my peer Anantak Singh- who has a wealth of Blender knowledge- saw me unsuccessfully trying to model my enclosure and began making one of his own. One major change that he made in his design as compared with mine was that he created two separate chambers - one for the CPE, and one for the Lipo which allowed it to slide in and out. The first 3-D print of this model did not allow enough space for either the battery or the CPE, but the second one fit wonderfully, especially once we utilized a wire heat shrink tube to help secure the battery in its enclosure. For the third print, he added bars on the side of the enclosure as spaces for the watch-like straps.
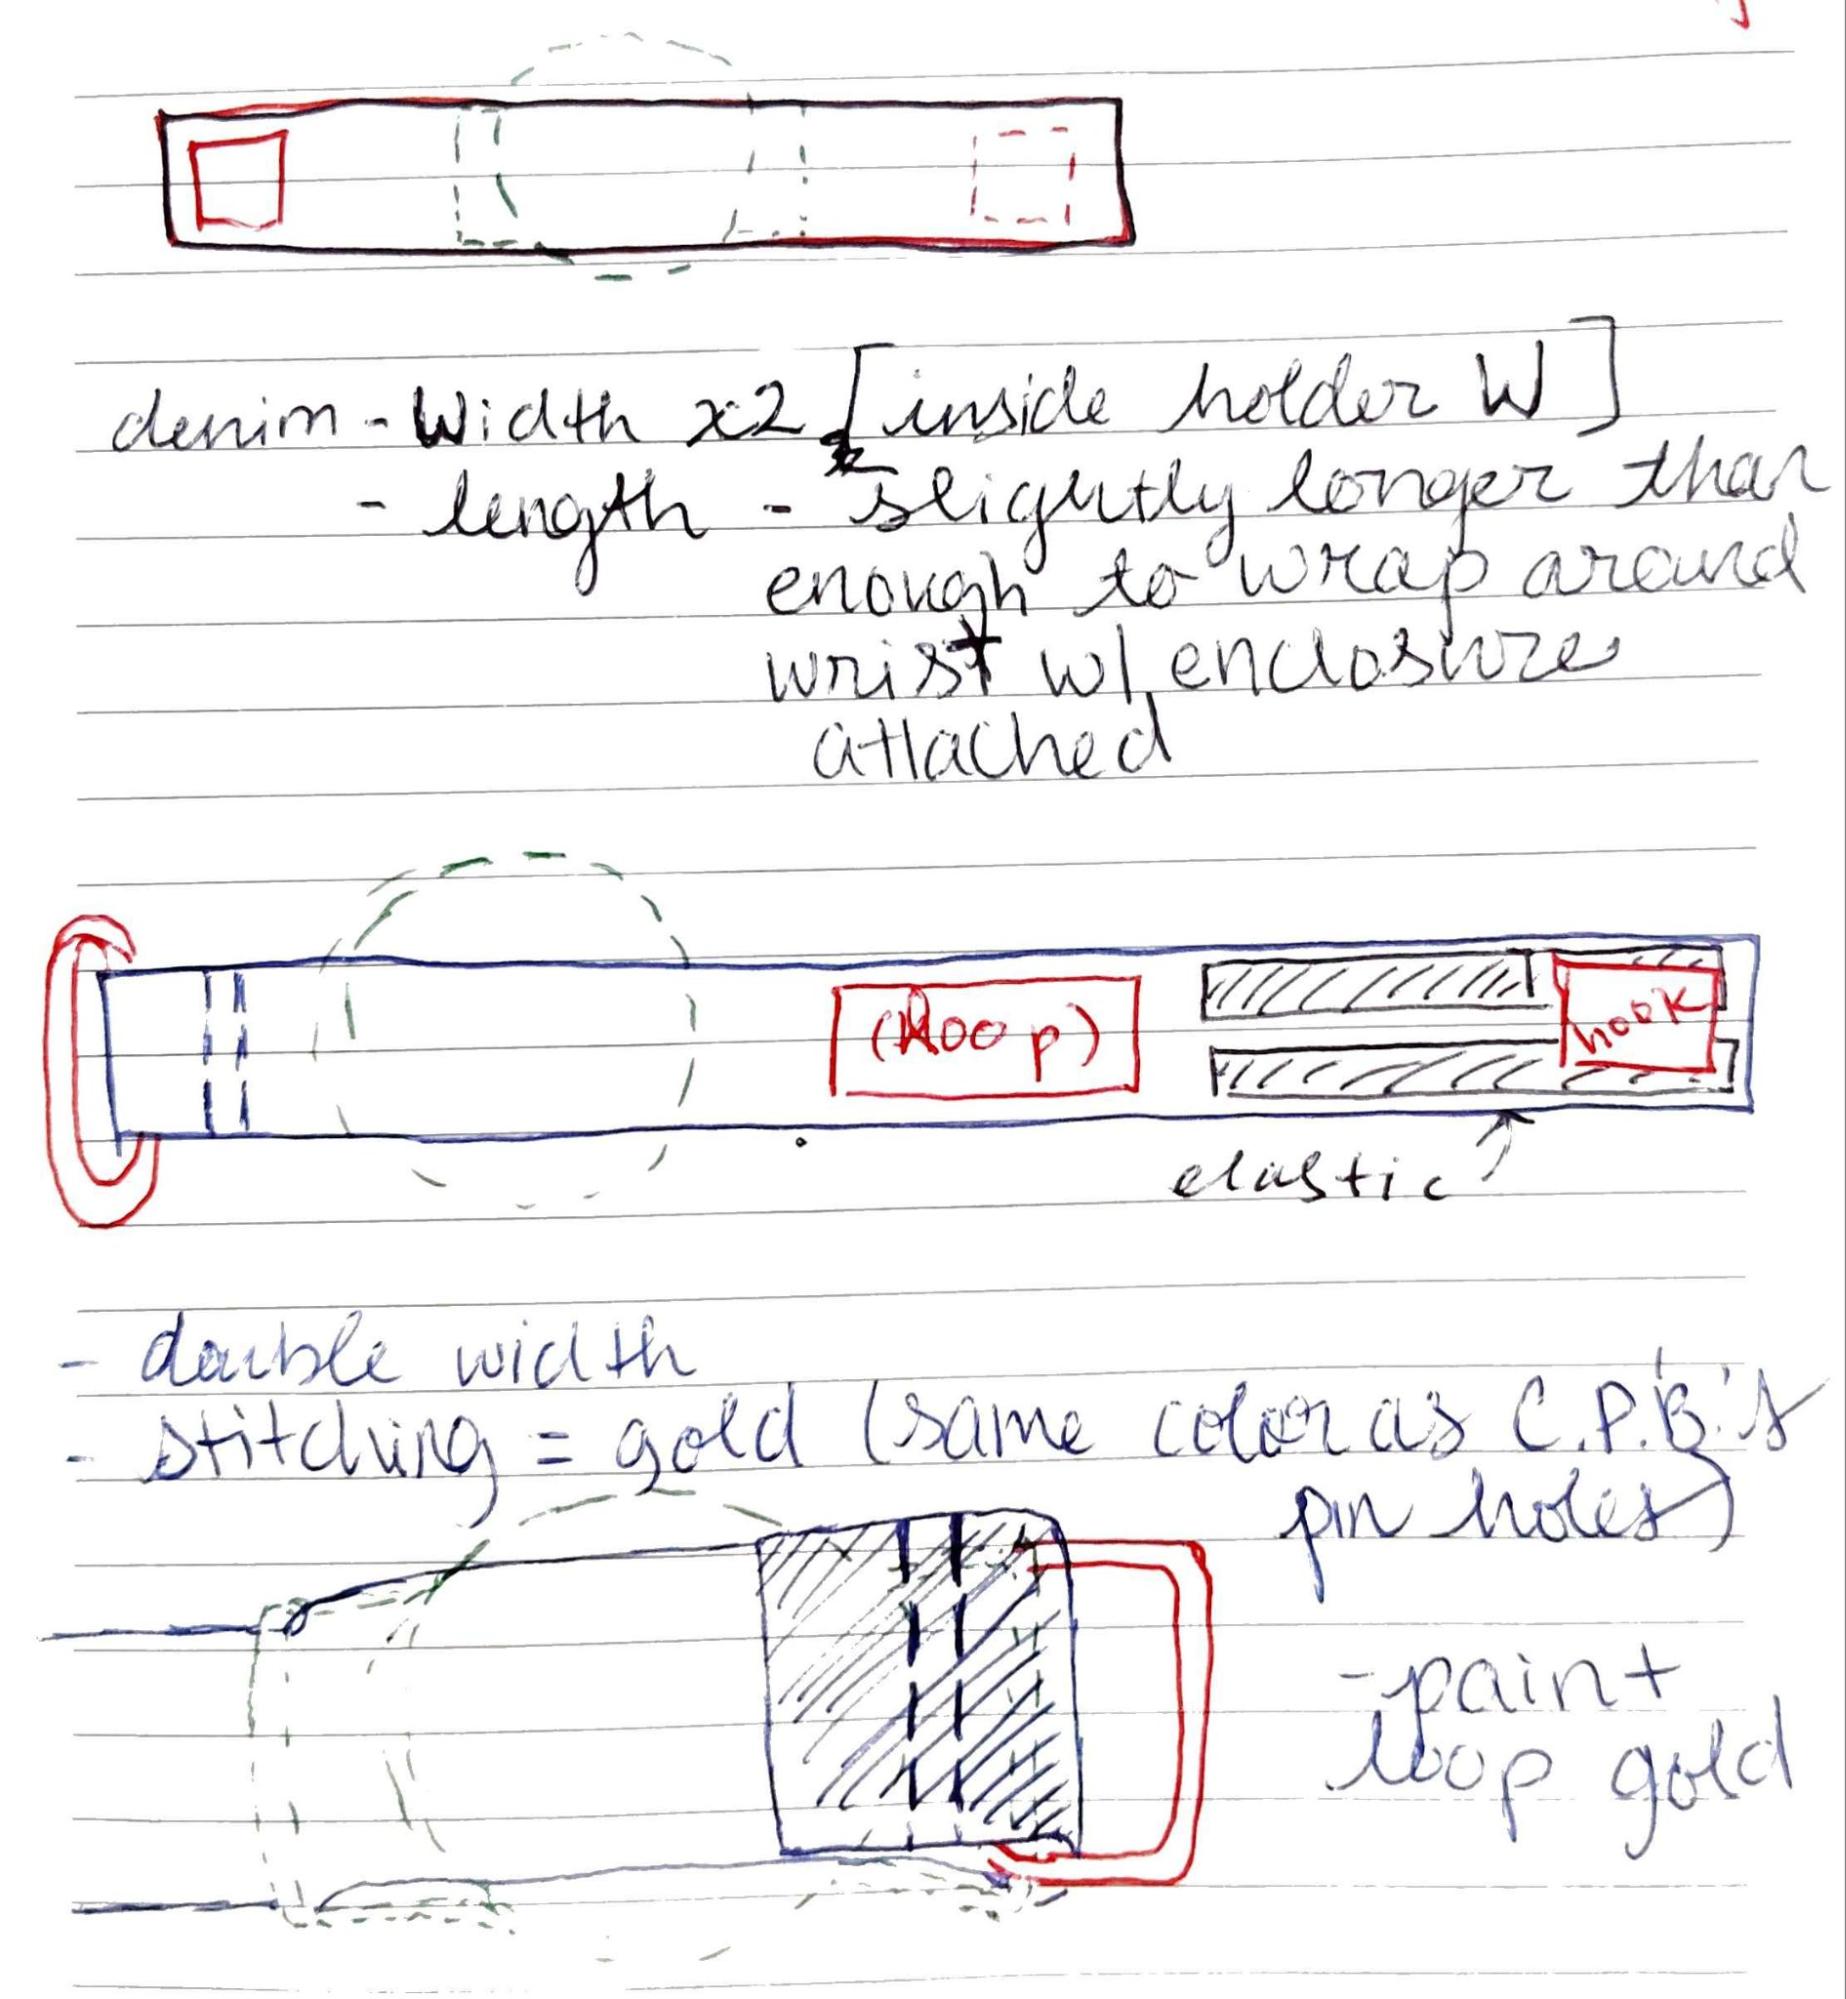
I then began iterating on how to style the straps for the enclosure. I realized that the buckles I had used while modeling the enclosure would not be appropriate, as they were far too bulky. I tested D-rings as well, and had considered this approach for a while until I thought a bit deeper about the context surrounding this piece: as opposed to a traditional wristwatch, the strap for this piece should be made to very easily be taken on and off. For this reason, I decided that velcro would be the ideal enclosure type, as it is easy to put on/ take off, creates a secure fit on the wrist, and is adjustable for various wrist sizes.
I was initially unsure whether to use a two piece strap design, where there are two separate straps attached to either side-bar of the enclosure and then meet in the middle, or to use a one piece design which goes under the enclosure then meets at either end. When testing the fit of each design, there did not seem to be one which was more apt than the other. After much consideration, I decided to implement the one-strap design, because it provides an extra layer of protection between the wearer and the Lipo battery.
When researching which side of the strap to put the hook/loop pieces of the velcro, I came across a video on the TechSwiss Hook & Loop Watch Band. After testing this design, I decided to implement something similar for my hook and loop closure.
For the coloring of the strap, I took inspiration from the Circuit Playground itself. By this time, I had swapped to the Circuit Playground Bluefruit (CPB) board. This board is a deep blue color with golden connection pads around its edges. To match the color of the board, I created the strap out of denim. I then topstitched the strap with a golden thread on one side and white thread on the other- the gold to match the pads, and the white to match the color of the 3D printed enclosure. These colors are also found in the white velcro and golden ring that are a part of the straps closure design. The outcome is a stylish piece of wearable gaming tech.
Two alterations which could improve this project are in its hardware design, especially relative to the battery, and by utilizing the Circuit Playground Bluefruit’s Bluetooth capabilities.
First, it would certainly be ideal to have a smaller battery. In the future, I plan to purchase the 420mAh Lipo Battery with short cable from Adafruit to use with this controller. With a battery that fits entirely under the board, I can create a less obstructive enclosure to allow for a more comfortable and stable wearing experience. The short battery cable would also lead the design to look cleaner and less home-made.
Regarding the battery, I would also like to try implementing a simple switch via conductive velcro in the strap. This would allow users to turn on the device simply by putting it onto their wrist, as opposed to connecting the JST directly. Given my Lipo struggles during this experience, I decided not to attempt the conductive velcro approach at this time.
Finally, I would also be interested to explore the possibility of utilizing the CPB’s Bluetooth capabilities to keep track of player scores via an online database. This would be a fun way to add another layer of excitement, competition, and permanence to the experience of playing this game.
Creative Controller: Pixel Chase March 2026